This article presumes that you know at least basics of Android Development, including using Android Studio and creating a simple one-screen app with a list in it. Also, Kotlin. Now that is clear, let's head to using the RecyclerView.
If you want to add a list to your app, the obvious choice is a RecyclerView. Let's use it, and add some cards for the list to make it look cool! (Who does not like cards?)
We start with creating a simple application in Android Studio by clicking New Project... and then using the Basic Activity template for the application. You need to choose Kotlin as Language, and after clicking Finish, add following dependencies in the app/build.gradle file.
implementation 'androidx.core:core-ktx:1.2.0'
implementation 'com.google.android.material:material:1.1.0'
implementation 'androidx.constraintlayout:constraintlayout:1.1.3'Write the base code
Let's write the necessary code, after which we can experiment with the list.
Activity class
In Activity class, we initialize the RecyclerView with a LayoutManager, and an Adapter for the child items.
package dev.aruke.sampleapp

import android.os.Bundle
import androidx.appcompat.app.AppCompatActivity
import androidx.recyclerview.widget.LinearLayoutManager
import kotlinx.android.synthetic.main.activity_main.*

class MainActivity : AppCompatActivity() {

    override fun onCreate(savedInstanceState: Bundle?) {
        super.onCreate(savedInstanceState)
        setContentView(R.layout.activity_main)

        recyclerView.apply {
            layoutManager = LinearLayoutManager(this@MainActivity)
            adapter = Adapter()
        }
    }
}Activity Layout
The layout contains various elements, but the important one is the RecyclerView.
<?xml version="1.0" encoding="utf-8"?>
<androidx.coordinatorlayout.widget.CoordinatorLayout xmlns:android="http://schemas.android.com/apk/res/android"
    xmlns:app="http://schemas.android.com/apk/res-auto"
    android:layout_width="match_parent"
    android:layout_height="match_parent">

    <com.google.android.material.appbar.AppBarLayout
        android:layout_width="match_parent"
        android:layout_height="wrap_content"
        android:theme="@style/AppTheme.AppBarOverlay">

        <androidx.appcompat.widget.Toolbar
            android:id="@+id/toolbar"
            android:layout_width="match_parent"
            android:layout_height="?attr/actionBarSize"
            android:background="?attr/colorPrimary"
            app:popupTheme="@style/AppTheme.PopupOverlay" />

    </com.google.android.material.appbar.AppBarLayout>

    <androidx.recyclerview.widget.RecyclerView
        android:id="@+id/recyclerView"
        android:layout_width="match_parent"
        android:layout_height="match_parent"
        app:layout_behavior="com.google.android.material.appbar.AppBarLayout$ScrollingViewBehavior" />

    <com.google.android.material.floatingactionbutton.FloatingActionButton
        android:id="@+id/fab"
        android:layout_width="wrap_content"
        android:layout_height="wrap_content"
        android:layout_gravity="bottom|end"
        android:layout_margin="@dimen/fab_margin"
        app:srcCompat="@drawable/ic_favorite_black_24dp" />

</androidx.coordinatorlayout.widget.CoordinatorLayout>Item layout
The layout represents the view for each child item. It has a simple CardView.
<?xml version="1.0" encoding="utf-8"?>
<FrameLayout xmlns:android="http://schemas.android.com/apk/res/android"
    android:layout_width="match_parent"
    android:layout_height="wrap_content">

    <androidx.cardview.widget.CardView
        android:layout_width="match_parent"
        android:layout_height="80dp"
        android:layout_margin="16dp" />

</FrameLayout>Adapter
Obviously, we have to write an Adapter. Though this article does not include its explanation, here's the code.
package dev.aruke.sampleapp

import android.view.LayoutInflater
import android.view.View
import android.view.ViewGroup
import androidx.recyclerview.widget.RecyclerView

class Adapter : RecyclerView.Adapter<Adapter.ItemViewHolder>() {

    override fun onCreateViewHolder(parent: ViewGroup, viewType: Int): ItemViewHolder {
        val layoutInflater = LayoutInflater.from(parent.context)
        return ItemViewHolder(layoutInflater.inflate(R.layout.item_layout, parent, false))
    }

    override fun getItemCount(): Int = 100

    override fun onBindViewHolder(holder: ItemViewHolder, position: Int) = Unit

    class ItemViewHolder(itemView: View) : RecyclerView.ViewHolder(itemView)
}Preparations Done!
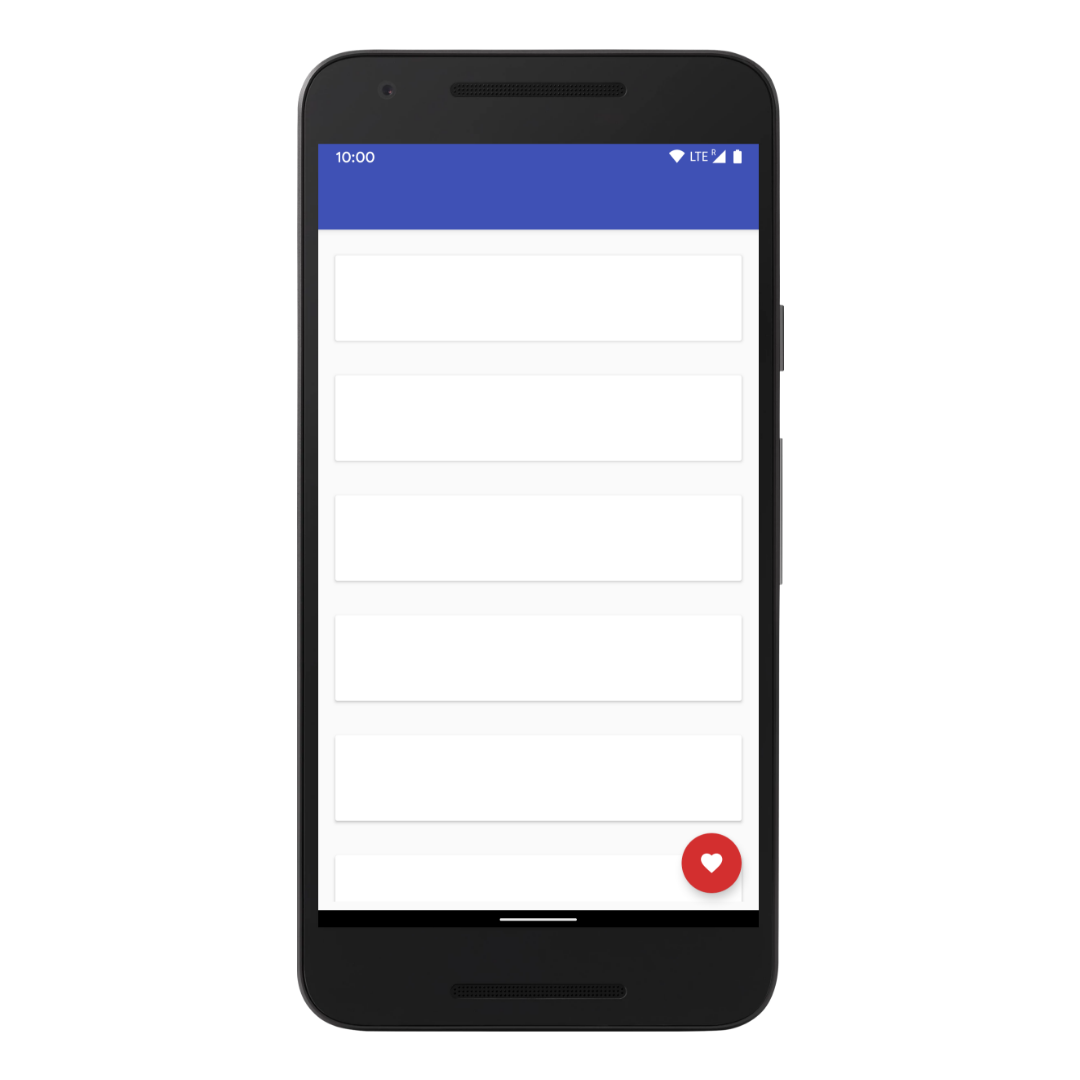
Now running the app should give us a nice looking list of cards.

The uneven spacing issue
Oh, but it seems the space between cards is more than the top card and containers top.

We have two ways to fix this.
- Change the item layout to have
startMarginandendMarginto 16dp and give the card either of the top or bottom margin. In this case, also we need to add some padding to theRecyclerView, either to the top/bottom. - Another way is to add top and bottom padding to the
RecyclerView. This way is better since it keeps the symmetry in the item view, and you don't have to remember that you gave the card top margin or the bottom margin.
I'm going to go with the second way. There might be other ways to do this. Please let me know if you find any other.
After adding paddingTop and paddingBottom to the RecyclerView, rerun the app.
<androidx.recyclerview.widget.RecyclerView
    android:id="@+id/recyclerView"
    android:layout_width="match_parent"
    android:layout_height="match_parent"
    android:paddingTop="8dp"
    android:paddingBottom="8dp"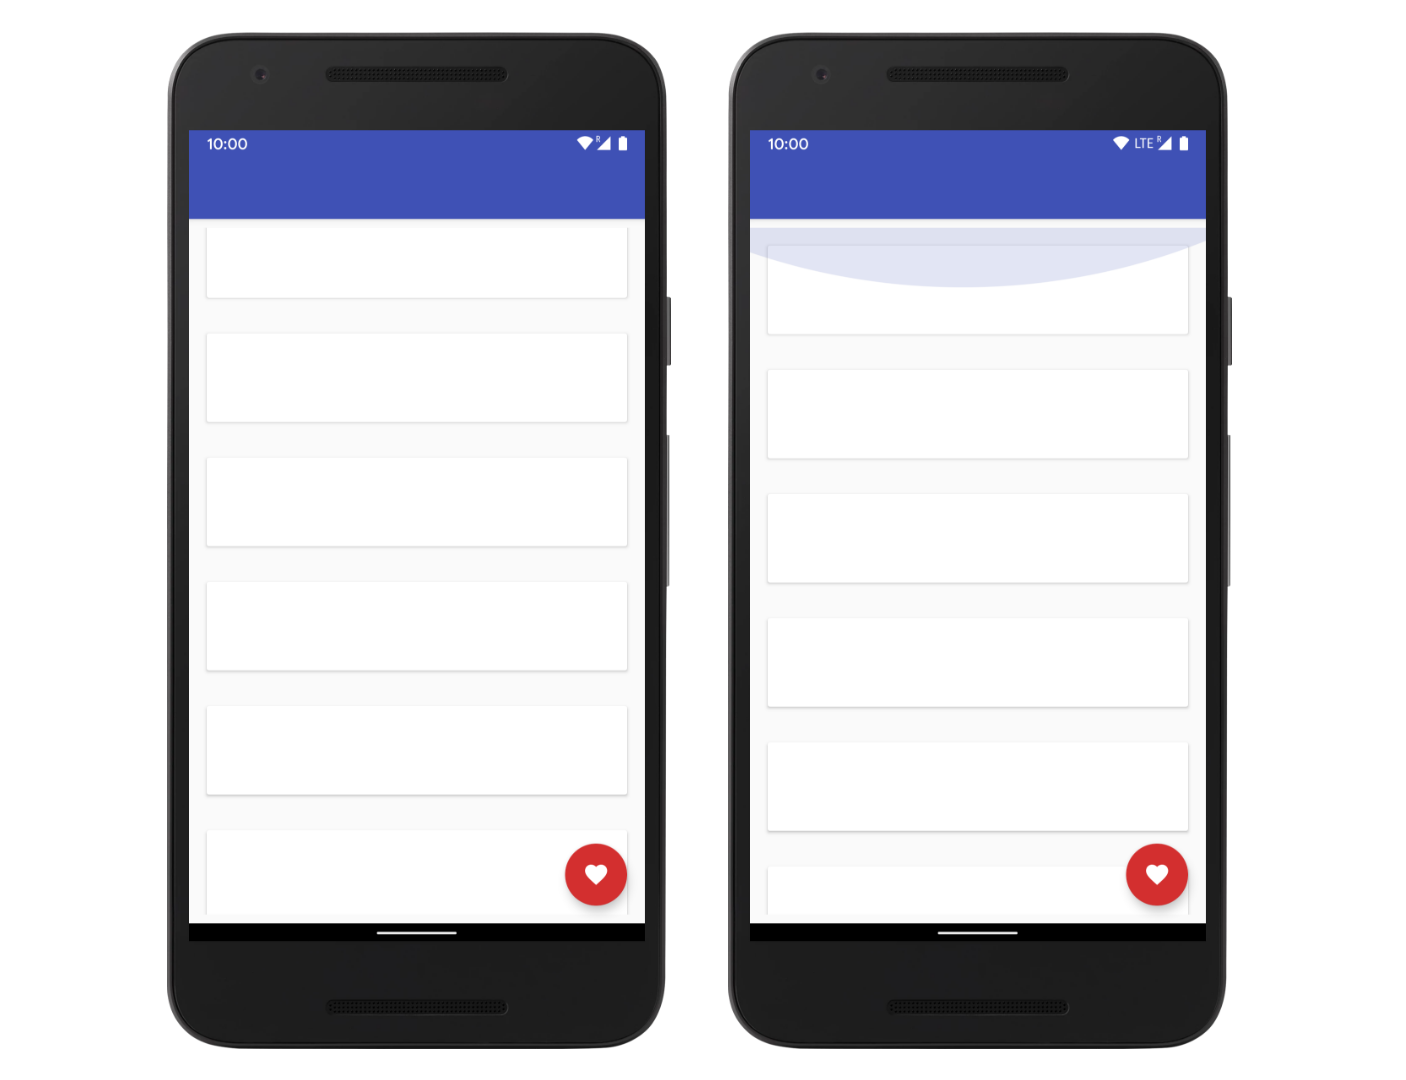
app:layout_behavior="com.google.android.material.appbar.AppBarLayout$ScrollingViewBehavior" />It results in the following screen:
It does look right now. But wait! When you scroll, you can see the gap between the toolbar and the first card.
The weird spacing issue
Also, there is space between the bottom card and the parent, and when you scroll, the scrim looks not so good.
The reason
RecyclerView is a ViewGroup, and by default, a ViewGroup clips it's children for padding, or in other words, it won't let the children view draw in the padding area.
We can change this behavior easily by adding clipToPadding to the RecyclerView.
If we set clipToPadding to false, RecyclerView allows the cards to be drawn in the padding area. Now the RecyclerView becomes:
<androidx.recyclerview.widget.RecyclerView
    android:id="@+id/recyclerView"
    android:layout_width="match_parent"
    android:layout_height="match_parent"
    android:clipToPadding="false"
    android:paddingTop="8dp"
    android:paddingBottom="8dp"
app:layout_behavior="com.google.android.material.appbar.AppBarLayout$ScrollingViewBehavior" />Rerun the app, and you see the magic!
Summary
We used the attribute clipToPadding to create better-looking RecyclerView.